
All content Copyright 2022 Parallel Systems Ltd.
1. Open the Trng.olb library.
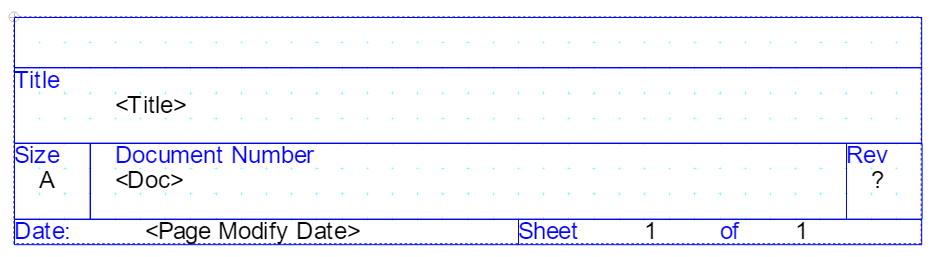
2. Double-click the TitleBlock0 symbol name to view the default titleblock symbol.
The title block symbol appears. Notice that the symbol already contains properties for title, revision, document number, modify date, page number and page count.
3. Left-click “+” in the Property Sheet at the right-hand side
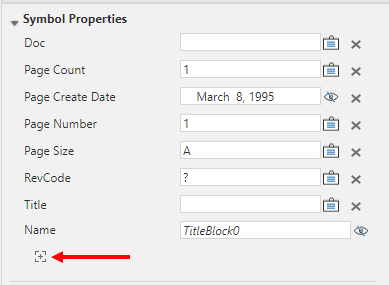
4. The New Property boxes appear:

5. Left-click on the “down triangle” top open the Standard Properties and select OrgName
In order for this property to reference data in the design template, the Value field will need to be left blank.
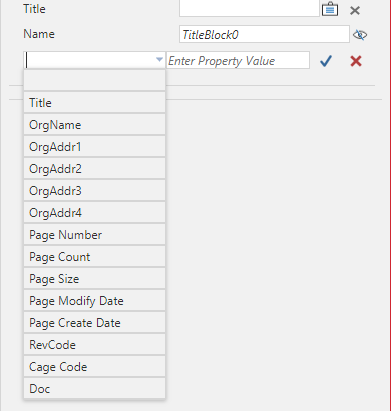
6. Left-click the “tick” to the right of the “Property Value” box to add the property.

7. Left-click the icon to the right of the added property
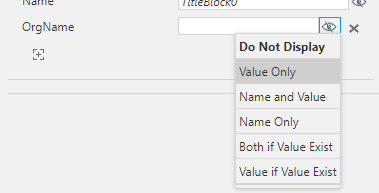
8. Left-click>Value Only from the Visibility choices.
9. Repeat the Add property process for properties OrgAddr1 through OrgAddr4 properties. (Or as many as will match the used Address properties in the Design Template. Also all four address properties may not be currently needed but they might be needed in the future. Be sure to leave the Value fields for these properties blank.)
10. Set the Display for added OrgAddr properties to Value Only.
11. Add another property for Cage Code, leave the Value field blank, set the Display to Value Only.
(This property could be omitted if not required)
The newly added properties appear beneath the title block symbol, similar to the example shown in the following graphic.
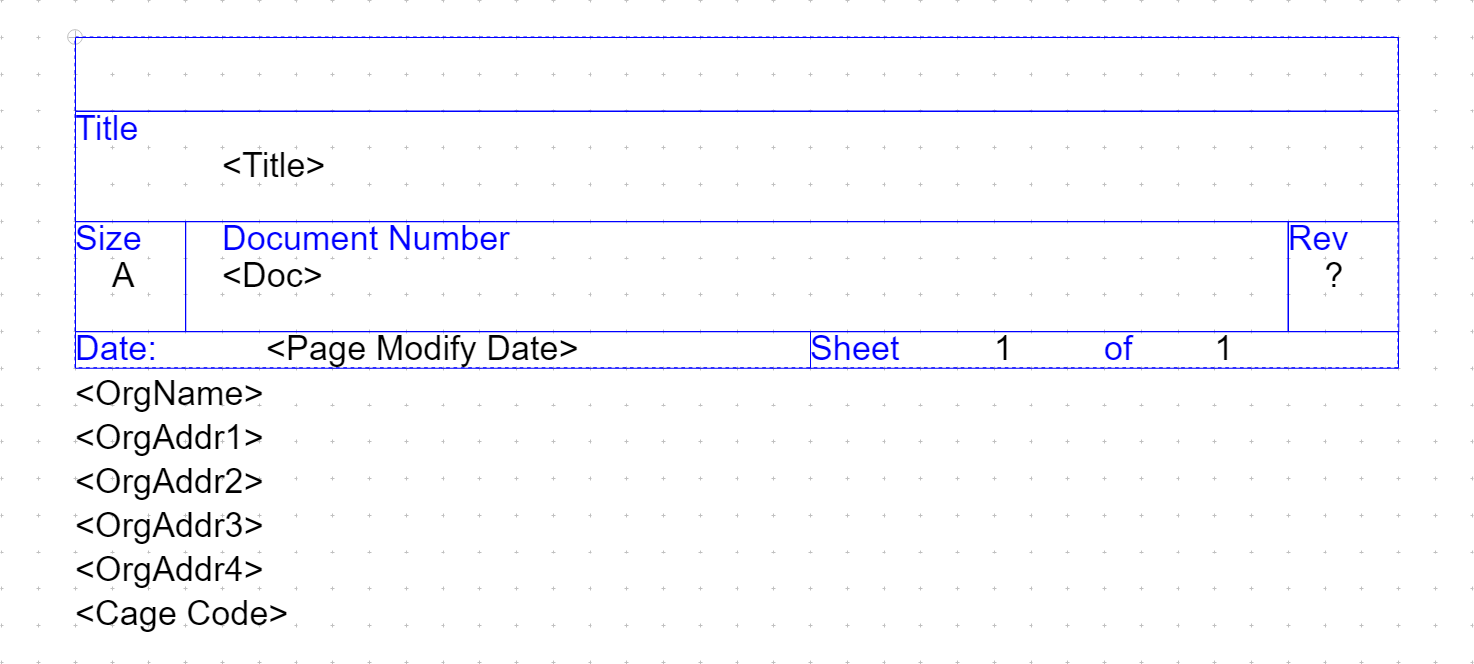
12. Enlarge the upper rectangle of the title block to accommodate these properties.
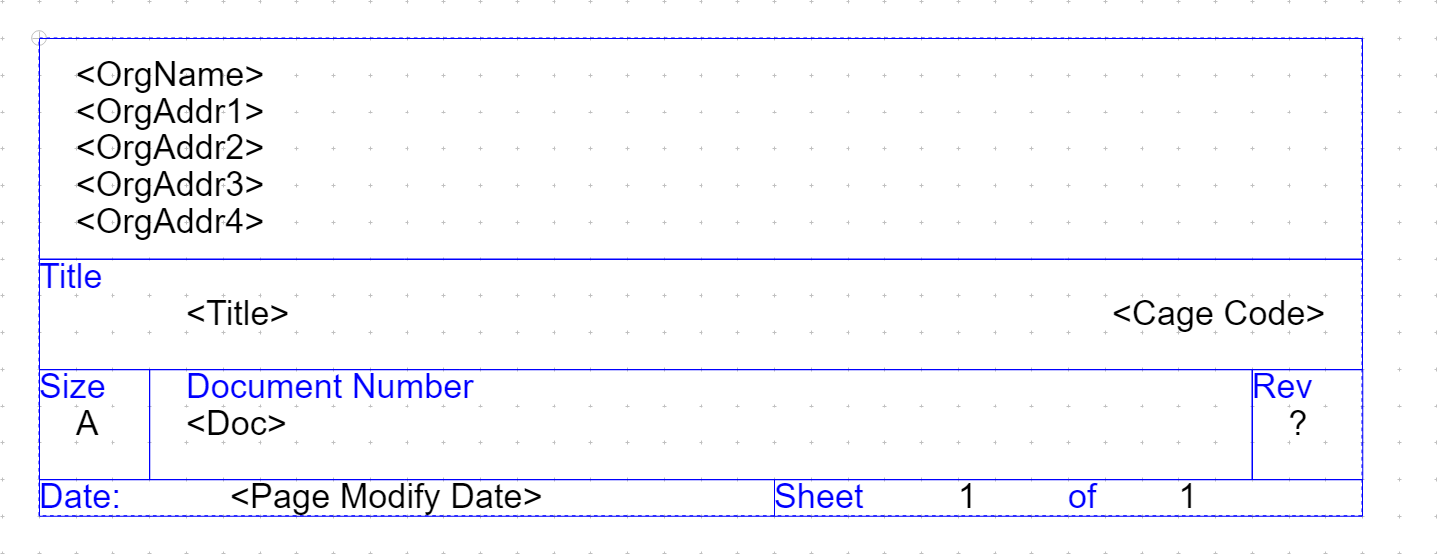
Note that the existing properties will be “anchored” to the upper left origin. Left-click on one of the displayed values and control+left-click on the remainder to select them all, hover the mouse over one of the selected properties, then left-click and drag to move them back to their original positions relative to the existing objects.
13. Left-click and drag the new properties into their desired locations within the title block, as shown in the example below.
14. Select File>Save from the top menu.
Note
For hierarchical designs, you might consider adding the Schematic Path property to title block symbols. This ensures that every page in the design displays a path showing its relative position in the hierarchy.
From Release 16.3 onwards, the logo can be be a BMP, JPG, GIF, PNG or TIFF format file. Bear in mind that the logo is probably not going to print much bigger than an inch or two, 25 to 50mm, on the page so consider pre-scaling the image accordingly before embedding a large high-resolution image. This will only lead to enlarged DSN files.
15. Select Place>Picture from the top menu.
16. In the Place Picture window, navigate to the directory that contains the required picture file and left-click>Open.
17. Once the “wait” cursor has disappeared, Left-click to set the lower left position of the imported logo, move the mouse to set the logo size and left-click again to set the logo size.
18. If necessary, left-click on the logo image, and drag to move or use the corner selection boxes to re-size the logo as shown below. (For example)
You may find that turning off the “Snap to Grid” icon on the main toolbar,  will become
  when the grid is off, will help to precisely place and size the logo in the title block, turn the “Snap to Grid” back on afterwards otherwise subsequent placements will be off grid.
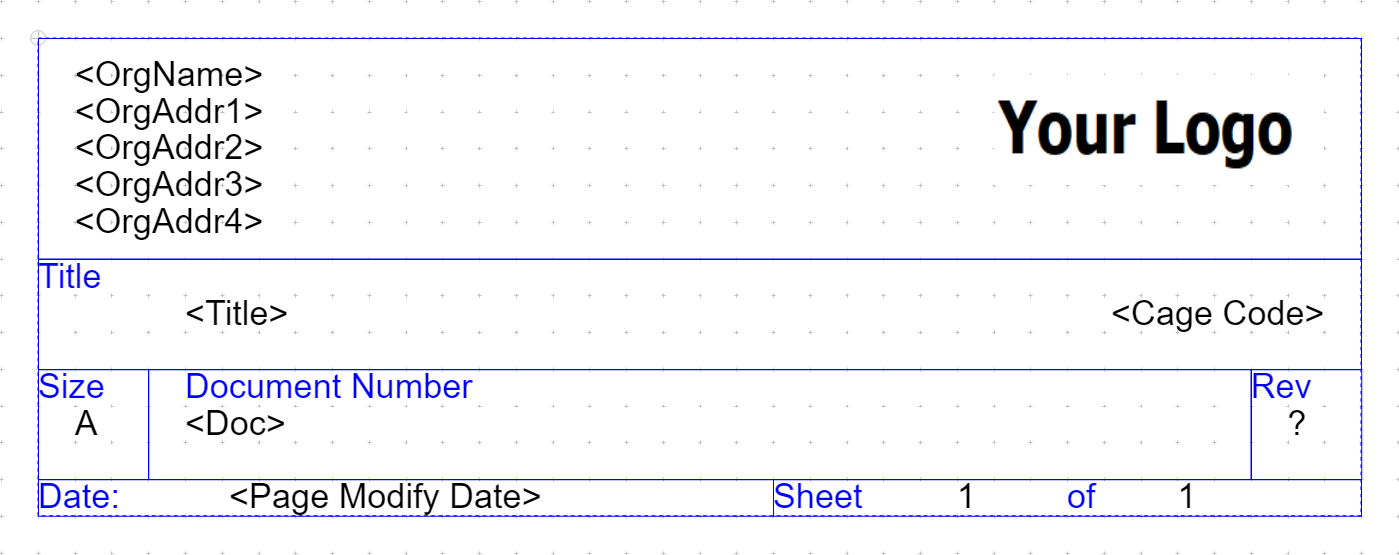
19. Select File>Save and File>Close from the top menu to save and close the title block symbol.
20. In the Project Manager window, left-click the Library name containing the Title Block to select it and select File>Save from the top menu.
21. Use File>Close the library.
22. Select Options>Design Template from the top menu.
23. In the Design Template window, left-click the Title Block tab.
24. Add the title block data as shown for your own company name and address.
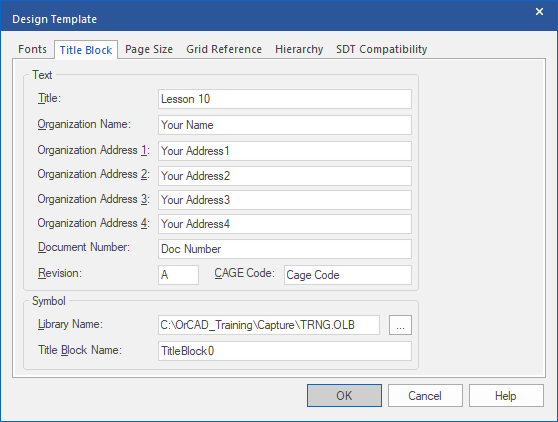
25. Use the Browse button to navigate to the saved library containing the modified Title Block.
(TRNG.OLB in the C:\OrCAD_Training\Capture directory is used in the screen shot)
26. Select the Library, OLB, file and left-click>Open.
27. In the Title Block Name field, enter:
TitleBlock0
(Or the name of the modified title block)
28. Left-click>OK.
To test your title block symbol and the Design Template information you just specified, you must create a new design.
29. Select File>New>Design.
30. If prompted to select a directory location, navigate to a convenient directory, give the project a name, something like “TBTest” will suffice since only the title block is being tested.
31. When the new schematic page opens, left-click the Zoom to all icon to see if your title block appears on the new page.
Note
If the new Title Block fails to be displayed as intended, recheck the library name and location and the title block symbol name in the Design Template, Title Block tab and change them accordingly, you will need to start another new design to test the settings.
If necessary make any amendments to the symbol graphics and layout and make another test.
32. Close the schematic window.
33. Select File>Close Project from the top menu.

End of Lab
All content Copyright 2022 Parallel Systems Ltd.