
All content Copyright 2022 Parallel Systems Ltd.
1. Select Place>Assign RefDes from the top menu.
2. Open Options to display the window, left-click in the Refdes field and enter:
j1
3. Left-click on any graphics associated with the connector symbol (DIN64) on the left side of the design. You may want to zoom in on the connector.
The refdes text J* (the placeholder text from the library part) has changed to J1.
4. Zoom out to include just the board by selecting the F2 function key.
Notice that, in Options, J1 has incremented to J2.
5. Left-click on the upper BNC (connex) connector at the right side of the board.
J* has changed to J2.
6. Left-click on the lower BNC (connex) connector at the right side of the board.
J* has changed to J3. Both BNC (connex) connectors now have reference designators assigned, and any nets of placed pins are displayed, as shown in the figure:
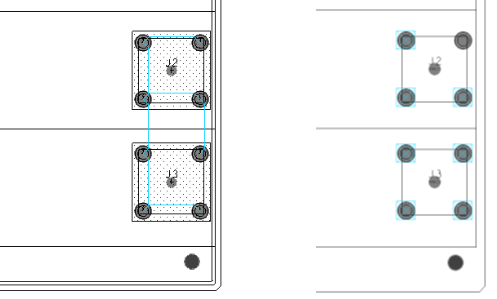
(There won’t be any “ratsnests” if Voltages were assigned by the Capture CM, shown on the right)
7. Right-click>Done from the pop-up menu.
8. Choose File>Save from the top menu.
A window appears and warns you that the constraints.brd file already exists, asking you whether you want to overwrite the file.
9. Left-click>Yes to confirm the overwrite.
The file constraints.brd is written to disk.
End of Lab
All content Copyright 2022 Parallel Systems Ltd.