
All content Copyright 2022 Parallel Systems Ltd.
To complete this lab, continue working with the RC project created in Lab 1-1.
1. Left-click and drag a window around the entire RC circuit to select it.
2. Move the mouse over the selected items to get the “4-arrow” cursor and right-click>Edit Properties
3. Left-click the Parts tab, at the bottom of the Properties listing, to edit part properties.
4. Left-click the Pivot button option to change the table from a horizontal to vertical format.
5. Left-click in the Value cell for R1 (1K) and press the Shift key and left-click the Value cell for R2 (also 1K)
(Or, left-click in the Value cell for R1 and drag the mouse into the Value cell for R2)
6. Right-click>Edit in the selected cell(s)
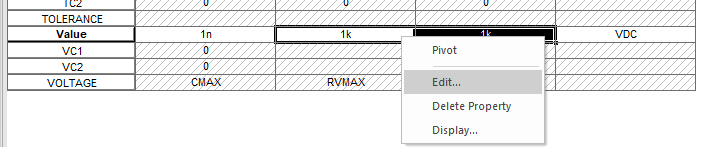
(Or select Edit>Properties from the Top menu)
7. Left-click in the Value edit box of Edit Property Values and set the value to 10
8. Left-click>OK to set the Value, or press Enter twice.
9. Move the mouse to the tab for the Property Editor at the top and right-click>Close, “Yes / OK” any Warning messages
10. Repeat the above steps to change the resistor values back to 1K.

End of Lab
All content Copyright 2022 Parallel Systems Ltd.