
All content Copyright 2022 Parallel Systems Ltd.
1. If necessary, start OrCAD Capture again and select an OrCAD PCB Designer Standard, or Professional, or OrCAD PCB Designer Standard, or Professional with Capture CIS option license if you see the License Picker and open the Release project
2. Select the Release.dsn file entry in the Project Manager window
3. Open / activate the Constraint Manager, left-click>OK if you get the “Enable Constraint Manager” message
4. Left-click on the Spacing domain at the left
5. Select All Layers in the Spacing Constraint Set folder
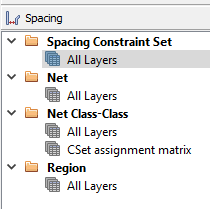
6. In the Default row, change all values to 0.15, as follows, left-click and drag the mouse through the values for “Line to” to “Hole to” for the Default row to select them. The “Hole to” value is “open” for editing.
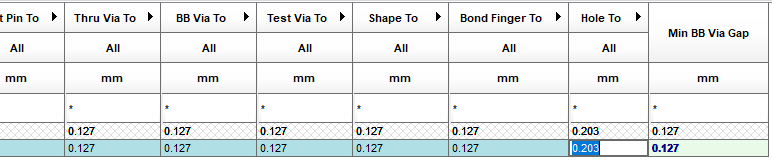
Type 0.15 on the keyboard to set the value.
The entire row values will change after a press of the Tab, or Enter, key.
(You may see an initial entry of *** for some values, setting a value of 0.15 will override all of the values)
7. Left-click the Default cell under Objects / Name.
8. Select Objects>Create>Spacing CSet from the Constraint Manager menu.
(or right-click>Create>Spacing CSet in the Default cell)
9. In the Create Spacing CSet form, enter Clocks for the name and left-click>OK
10. Left-click and drag the Clocks values, “Line to” to “Hole to”, to select them, type 0.2 and Enter, or Tab to change the values.

11. Create two more Spacing CSets, Power with all values set to 0.4 and Controlled with all values set to 0.25
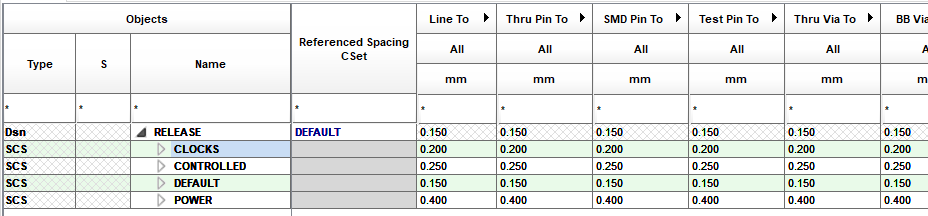
12. Select All Layers under the Net folder.
13. Left-click the “triangle” to the left of the Net Class names to expand the Net Class to see the member names.
14. Select the Referenced Spacing CSet cell in the SYNC row and select Clocks from the pull-down menu.
15. Repeat this to apply the Power Spacing Cset to the POWER Net Class.
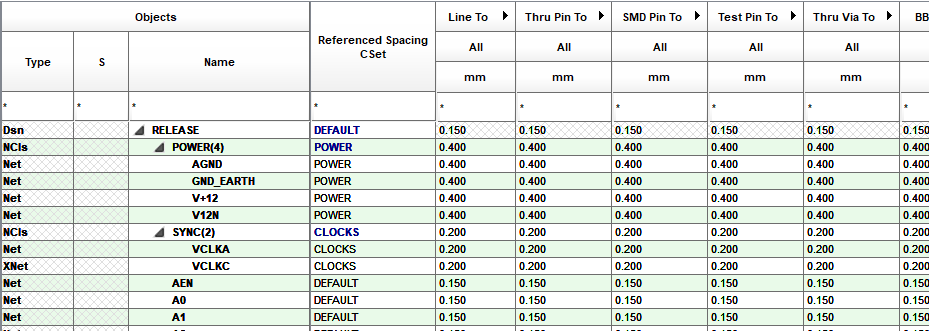
16. Move to the Main Capture window and use File>Save to save the DSN file at this stage.
17. Left-click>Yes All if any “save” message appears.
End of Lab
All content Copyright 2022 Parallel Systems Ltd.