
All content Copyright 2022 Parallel Systems Ltd.
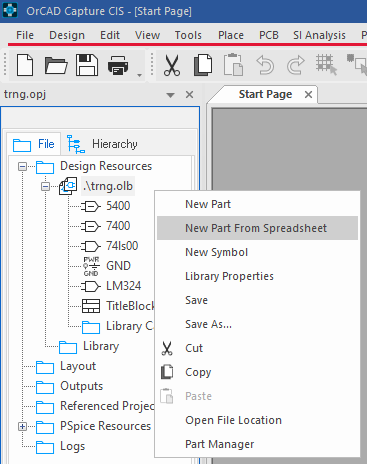
1. With the TRNG.OLB library still available in the Capture session window, highlight the library name.
2. From the right mouse button, pop-up menu, select New Part from Spreadsheet.
The New Part Creation Spreadsheet opens. It will look like the following figure:
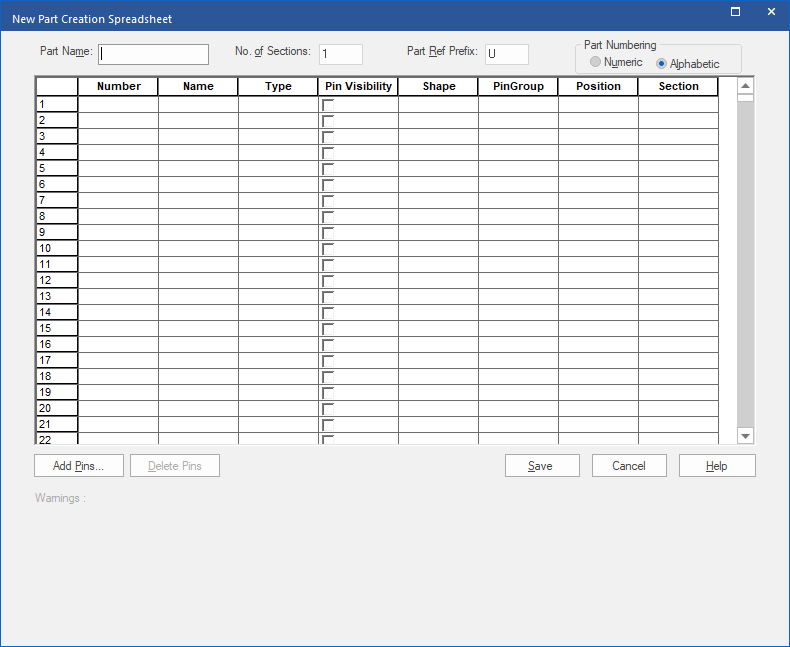
3. Enter PCA9548 for the Part Name.
4. In the No. of Sections box enter 3.
5. Using the following data, enter the values in the appropriate cells of the spreadsheet.
Pin Number Pin Name Pin Type Pin Shape Position Section
1 A0 Input Short Left A
2 A1 Input Short Left A
3 RESET Input Short Left A
4 SD0 Output Short Right A
5 SC0 Output Clock Right A
6 SD1 Output Short Right A
7 SC1 Output Clock Right A
8 SD2 Output Short Right A
9 SC2 Output Clock Right A
10 SD3 Output Short Right A
11 SC3 Output Clock Right A
12 GND Power Short Bottom C
13 SD4 Output Short Right B
14 SC4 Output Clock Right B
15 SD5 Output Short Right B
16 SC5 Output Clock Right B
17 SD6 Output Short Right B
18 SC6 Output Clock Right B
19 SD7 Output Short Right B
20 SC7 Output Clock Right B
21 A2 Input Short Left B
22 SCL Input Clock Left B
23 SDA Bi-dir Short Left B
24 VDD Power Short Top C
Note
To COPY column information use Control+C.
To PASTE into a column use Control+V.
Drag select a range in a single column, type the required value, when the value is exactly matched, the range will be filled with the value – use this for the Input and Output ranges for example.
6. Select Save to apply the data and create a new part.
Note
If you receive a warning, select View Warnings to display the potential errors for the part. After viewing, select Hide Warnings to close the Warning list. As we are not going to create a part with “gates” at this time so just select Save then Continue to apply all the input and create a part.
7. The new part will appear in the Library window. Open the Part PCA9548 by double clicking on it.
8. Now view the Package image.
9. It should resemble the following graphic:
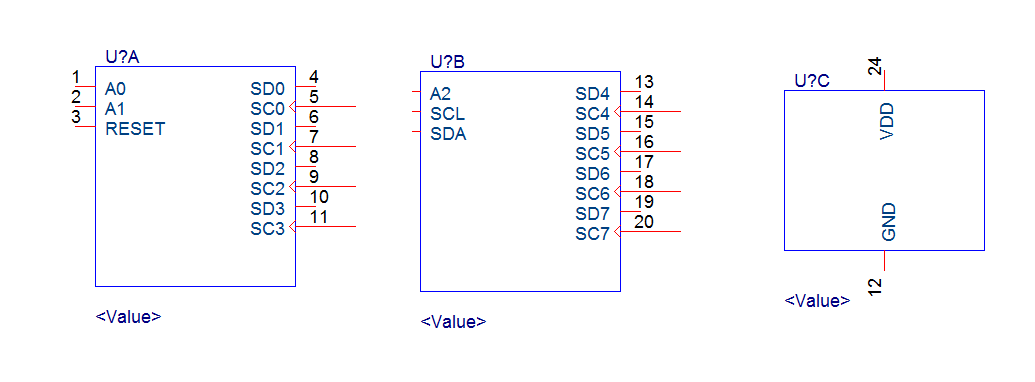
10. You could move the pins to the desired locations if you wish. User Properties could also be added at this time.
11. Close and Save the new part.

End of Lab
All content Copyright 2022 Parallel Systems Ltd.