
Start a New Project
Start a new OrCAD Capture Project from File>New Project in Capture. Unless intending to simulate the design in PSpice, don’t check the “Enable PSpice Simulation” option (PSpice simulation can be enabled at a later time, if required. Also enabling PSpice Simulation when the project is started will configure load some default PSpice libraries which contain parts fundamental to PSpice simulations)
Give the project a name and select a folder for the new project.
Once the new project has been created, the selected folder will contain: an OPJ file that references the DSN file; a DSN file based upon the Design Template with one schematic folder and page containing the Title Block selected, if any, added; and a DSNlck file which locks the DSN file from being accessed by other users.
Common activities in Capture have three ways to activate them: a menu, like Place>Part; a shortcut key, “P” or “p” for Place>Part; and an icon on the schematic toolbar,  for Place>Part.
Placing Parts
Place>Part opens docked to the right by default.
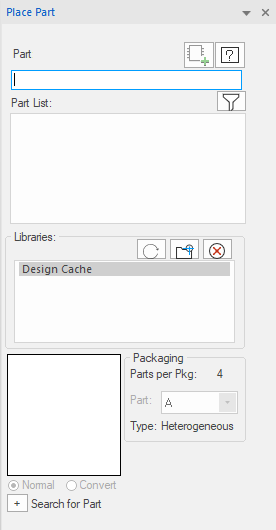
In the image above, there are no libraries added and Design Cache is the only item in the Library List. In the Libraries group, the icons from left to right are: Refresh Library; Add Library to the Library List; and Delete Library from the Library List.
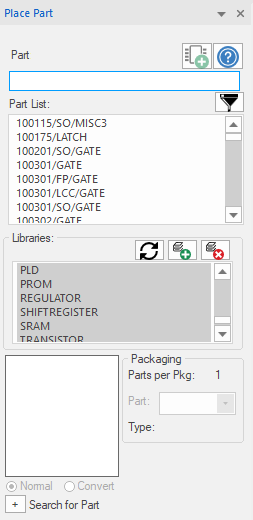
In the image above, all of the Capture libraries from the installation have been added. All of the libraries in the Library List have been selected – grey background – Individual libraries can be selected with a left-click and selection can be changed using the control and shift keys combined with a left-click to toggle the selection of libraries, left-click in the Library list and press the control and A keys together to select all of the libraries.
Left-click in the Part box and start typing the name of the Schematic Part, the Part List will scroll so that the entry at the bottom of the list starts with the first character typed, then the first two characters typed and so on until the required part is listed. A preview of the part will be displayed in the Place Part form as the selected item moves through the list. Scrolling through the Part List with the mouse is also possible. Left-click on the Part in the Part List to select it and press enter, or double-click on the Part in the Part List, to attach it to the cursor and move the mouse to the Schematic Page to see that Part, then left-click to place the part. The “Convert View” can also be selected if one has been created for the Part.
Note that “wild-cards”, the * character for example, are not required in the Part box. If used, these will cause the Part List to be filtered and there will be a message at the top of the Place Part form that the “Part List is filtered by …”. If you get this set the value in the Part box to only * and press enter to clear the filter. The filter will remove any parts not matching the filter from the Part List and prevent them from being selected for placement.
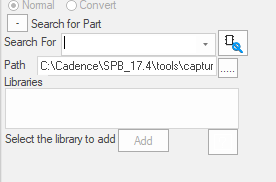
It is also possible to search a folder of OLB files for parts. Left-click on the “+” to the left of “Search for Part” to enable this function. Type the name of the required part in the Search For box and use the icon on the right to perform the search. The default search location is the Capture Library folder in the installation but any other location can be used, if required. “Wild-cards” can be used with the Part Search but note that * will match “anything” so, searches for parts using * in the search value may not provide very specific results.
There is also Place>Search Providers.
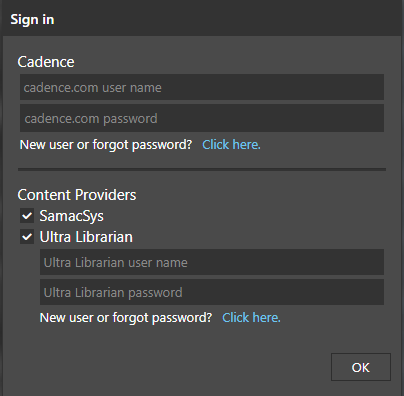
SamacSys requires a Cadence login account, one can be created if you don’t account with Cadence Online Support. Ultra Librarian requires registration at the Ultra Librarian site, there is a free subscription available.
Once a Part, or Symbol, is attached to the cursor for placement, it can be: Rotated with the “R” or “r” key; mirrored Horizontally, “H” or “h” key; mirrored Vertically, “V” or “v” key before placement. These keys can also be used after placement with the Part, or Symbol, selected.
Adding Wires
Add wires with: Place>Wire from the menu; “W” or “w” shortcut key; or the  icon.
icon.
Any wires added will be given a default name beginning with N followed by a “sequence number” to ensure that the wires are unique. Since locating specific nets with these default names is not easy, these default names can be overridden, once placed, by adding a Net Alias: Place>Net Alias from the menu; “N” or “n” shortcut key; or the  icon. Specify the required Net Alias in the form that appears and left-click>OK to attach the Net Alias to the cursor, then left-click on the Wire to attach the Net Alias to the Wire. If the name of the Net Alias ends with a number, the number will be incremented once the Net Alias is placed, so Q0 will become Q1, then Q2 and so on.
Design Cache
As part are placed on the Schematic Page a copy of the Library Part is added to the Design Cache.
Parts in the Design Cache can be: Updated, the original source Library is read and the Part in the Design Cache is updated with the current version of the Part in that Library; or Replaced, the Part in the Design Cache will be replaced with a different Part from a different Library.
Parts that are no longer used by the Design can be removed from the Design Cache by using the Cleanup Cache function.
All content Copyright 2022 Parallel Systems Ltd.