
All content Copyright 2022 Parallel Systems Ltd.
1. In the Project Manager window, left-click on .\lesson10.dsn, and select Tools>Create Netlist.
2. Left-click the PCB Editor tab and set the options as shown: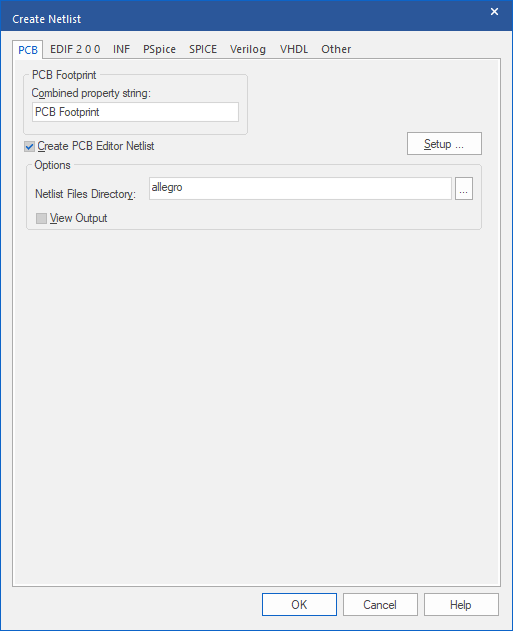
3. Left-click>OK to start creating the netlist.
4. Left-click>OK if prompted about the design being saved prior to netlisting.
5. Left-click>YES if prompted that the allegro directory does not exist and asked if you want it created.
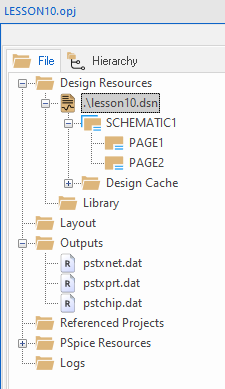
Capture creates 3 netlist files named pstxnet.dat, pstxprt.dat, pstxchip.dat.
6. In the Project Manager window, double-click on one of these files to open it for viewing.(under the Outputs folder).
7. When you have finished viewing the netlist, close the window.
8. In the Project Manager window, left-click on .lesson10.dsn.
9. Select File>Save.
This saves both pages of the design.
10. Close both schematic page windows.

End of Lab
All content Copyright 2022 Parallel Systems Ltd.