
All content Copyright 2022 Parallel Systems Ltd.
Note: this lab follows on from adding the ROOM property in lab 17-1, if you skipped that lab, move on to the later section that annotates “by folder / page”.
1. Left-click the DSN file entry (training.dsn) in the Project Manager window (tab).
2. Select Tools>Annotate from the top menu.
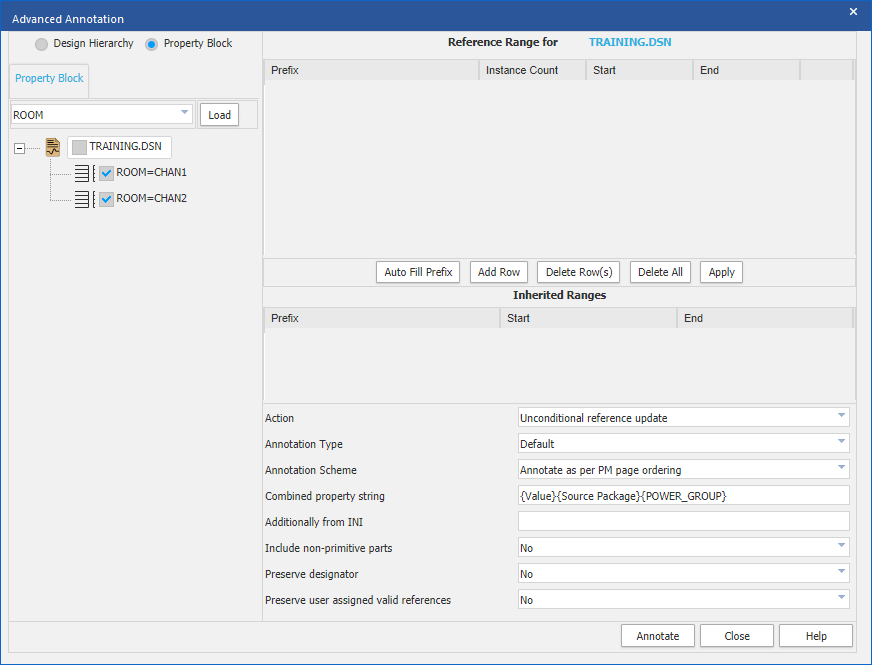
3. In the Annotate dialog, left-click>Advanced Annotation to open the Advanced Annotation form and see the “design browser” in the left hand window.
4. Left-click on Property Block option
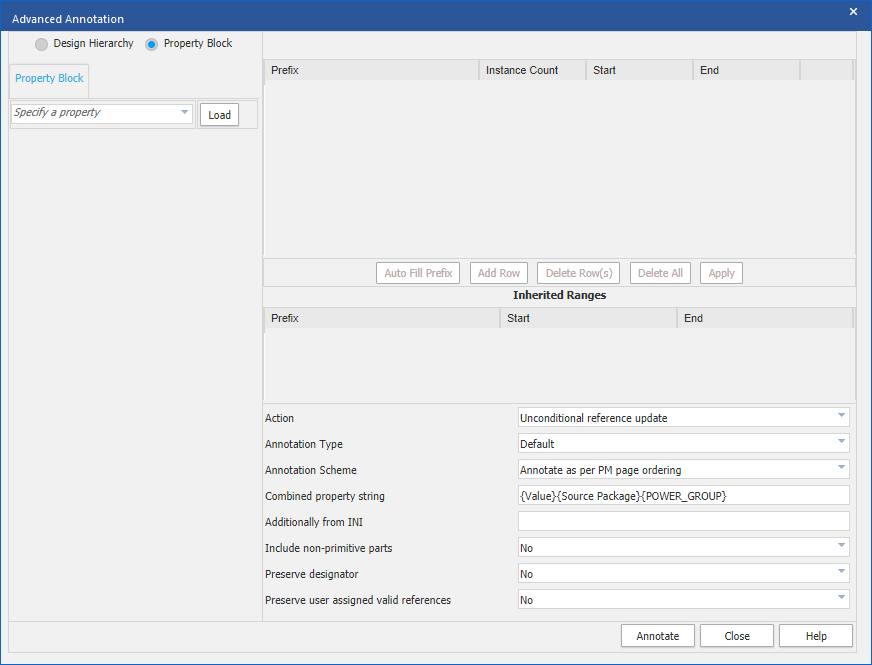
5. Left-click in the Specify a Property box and type ROOM as the property name and then left-click>Load to load the blocks with the ROOM property attached.
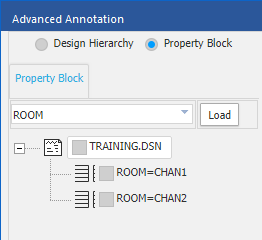
6. Then left-click the checkbox to the left of ROOM=CHAN1 and left-click>Auto Fill Prefix to see how many references are within the block for each prefix.
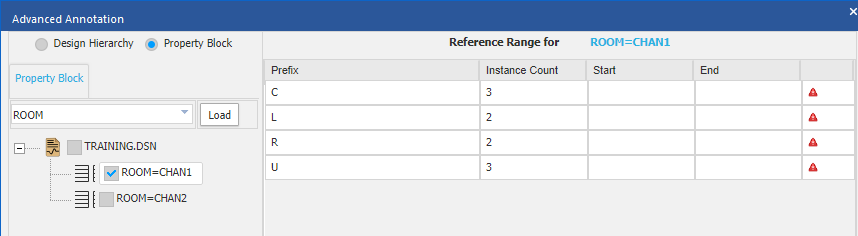
There are not many references and its not required to have an individual range for each prefix in this case.
7. Left-click>Delete All, Yes the message for removing the prefix settings for this block, and then left-click>Add Row.
8. Left-click in the Prefix box and type *, or select * from the drop-down, left-click in the Start and type the value 100, left-click in the End and type the value 104.
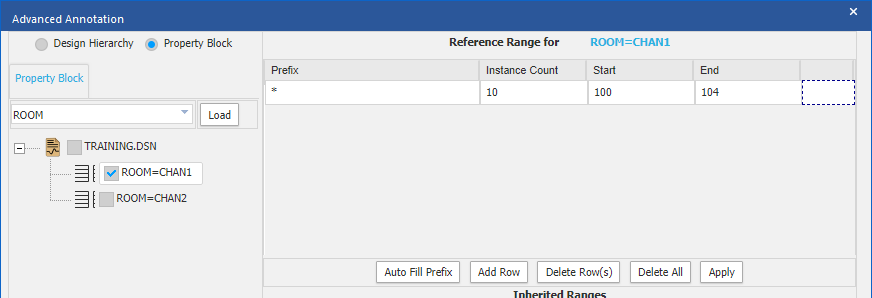
9. Left-click>Apply to save the setting.
10. Uncheck the box to the left of ROOM=CHAN1 and check the box to the left of ROOM=CHAN2
11. Repeat the steps to Add Row, set the Prefix to * and range to start at 105 and end at 109.
12. Left-click Apply to set the values.
13. Left-click the box to the left of training.dsn to select the whole design, set the Action to “Unconditional Reference Update” and left-click>Annotate.
14. Left-click>OK to “save design” prompt.
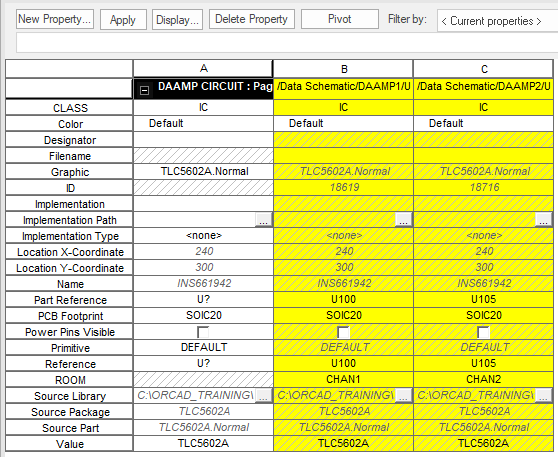
15. In the Project Manager window (tab), open the DAAMP Circuit / Page1 with a double-click, double-click one of the block occurrences, double-click on a part to edit the properties and note the annotation for each Room.
(U100 shown below from the CIS project).
Annotating by Folder / Page
1. Left-click the DSN file entry (training.dsn) in the Project Manager window (tab), right-click>Annotate.
2. In the Annotate dialog, left-click>Advanced Annotation to open the Advanced Annotation form and see the “design browser” in the left hand window. Leave the Design Hierarchy default selected.
3. Select an element in the hierarchy to set the annotation range for, like DAAMP1, for example.
4. Left-click>Auto Fill Prefix to see how many references are required, then left-click>Delete All to clear the list and left-click>Add Row to add a new row and specify * as the Prefix and specify a sufficient range, say Start 100 and End 104 for this example.
(As an alternative, ranges for each prefix could be set)
5. Left-click>Apply to set the range(s)
6. Set some more ranges, if required, using the same process.
7. Check that the Action is set to Unconditional Reference Update and then left-click>Annotate.
8. Open the schematic pages for the ranges that you have set and check the application of your annotation requirements.
End of Lab
All content Copyright 2022 Parallel Systems Ltd.